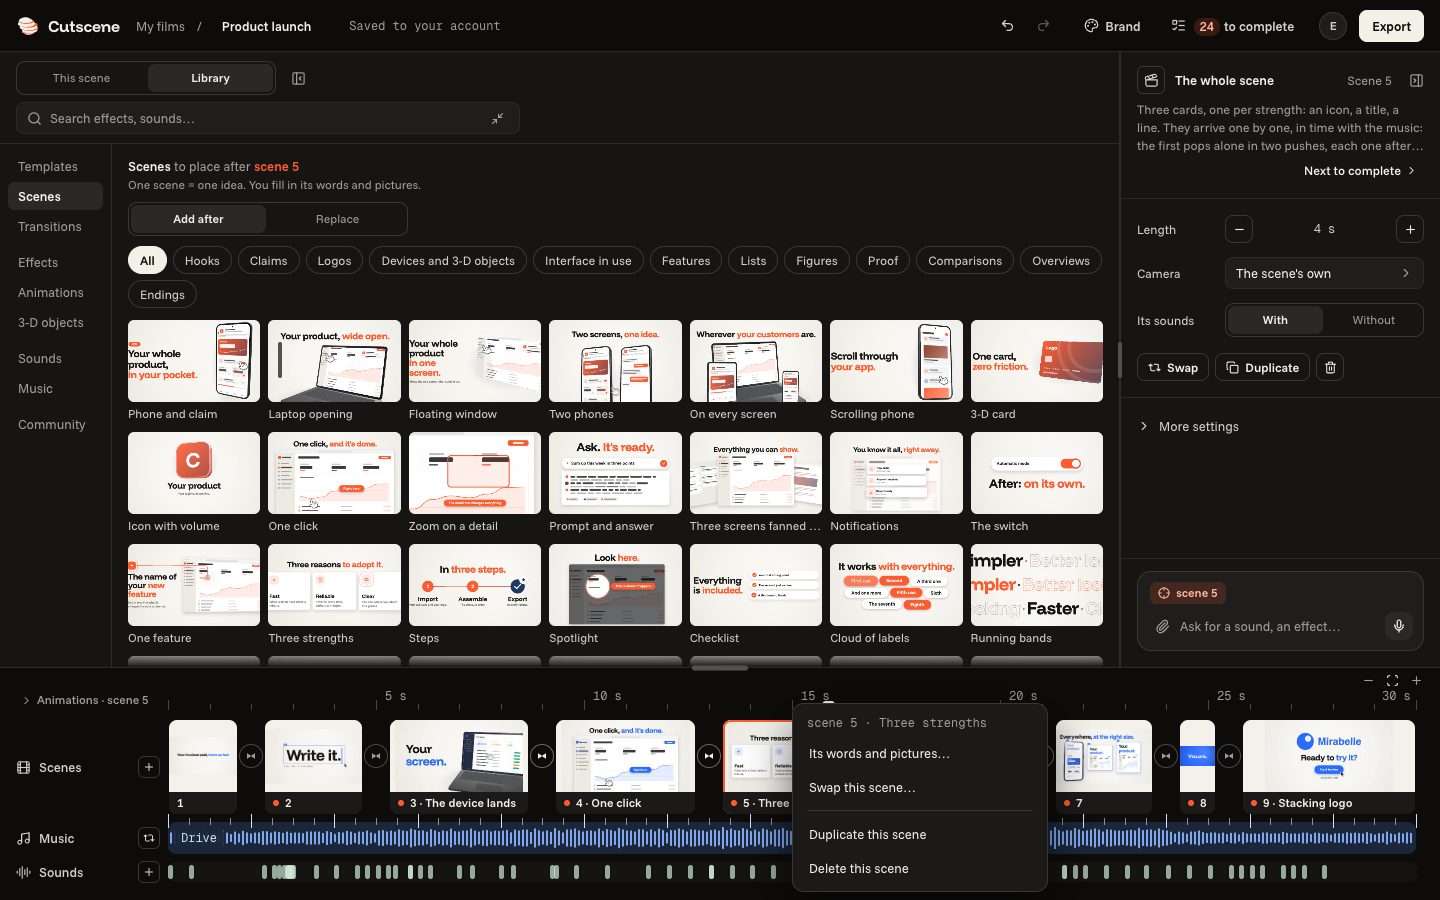
Adding, changing, moving a scene
A scene is one idea on screen. Add some, swap one, change their order.
4 steps
- 01
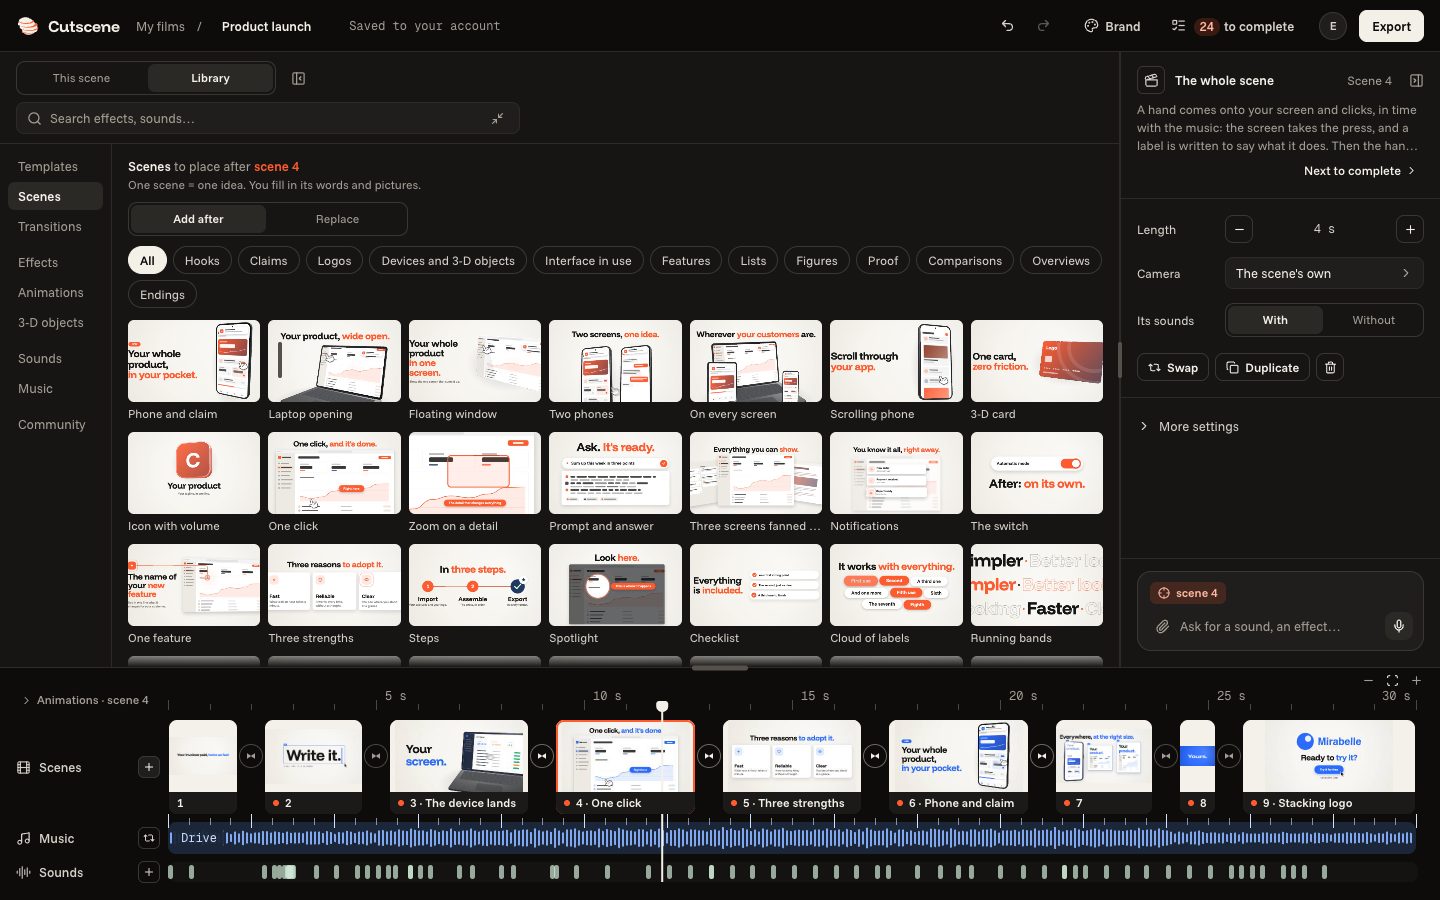
Add a scene
The “+” next to “Scenes”, at the bottom, opens the library's scenes. One click places the one you choose after the current scene.
- 02
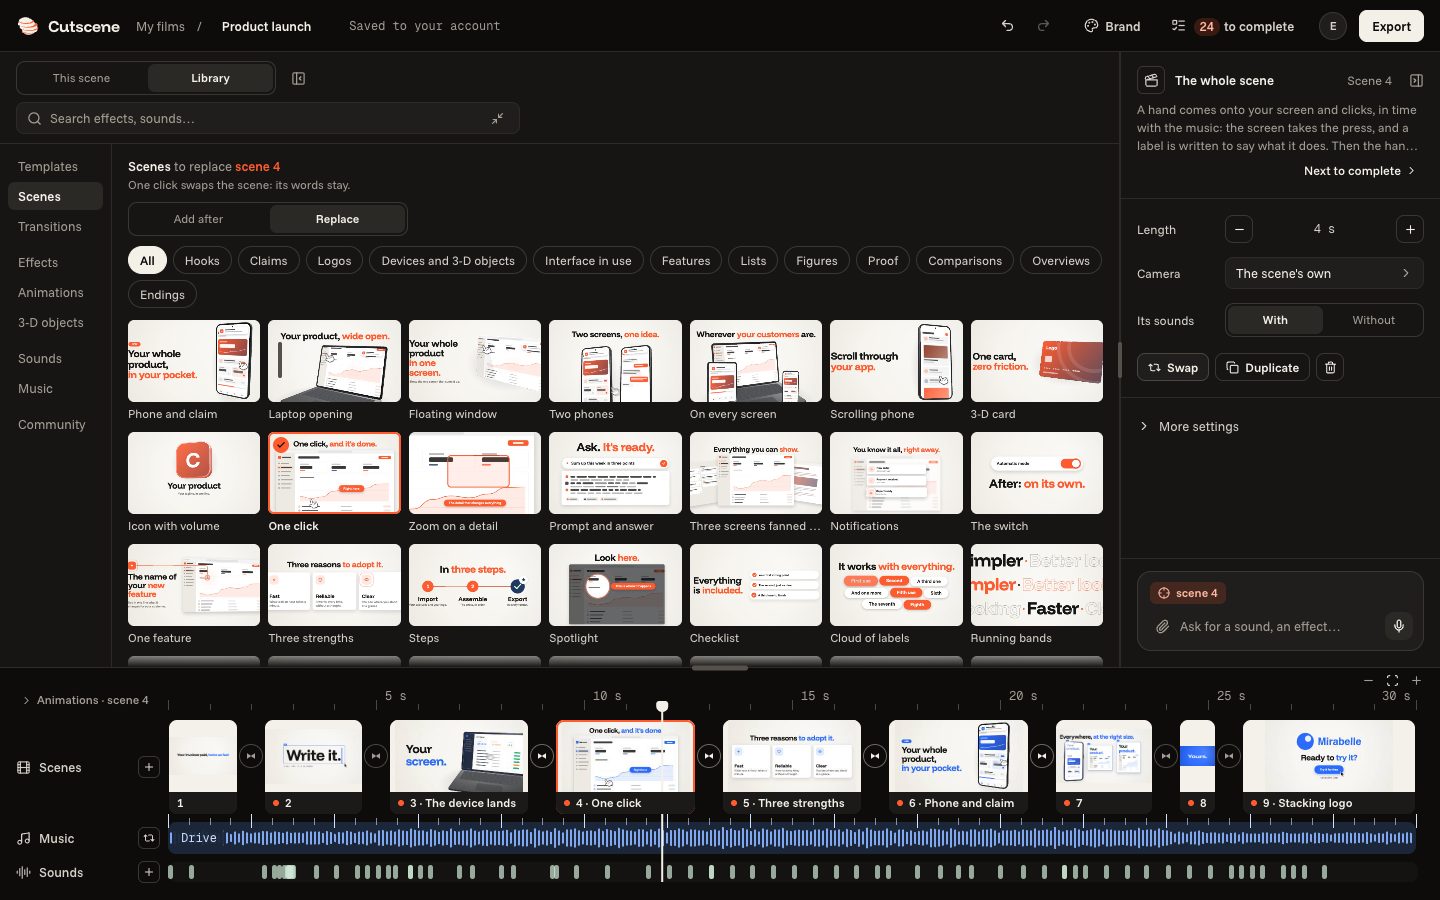
Swap a scene
On the right, in “The whole scene”, “Swap” opens the other scenes: one click replaces the one on screen, and your words stay.
- 03
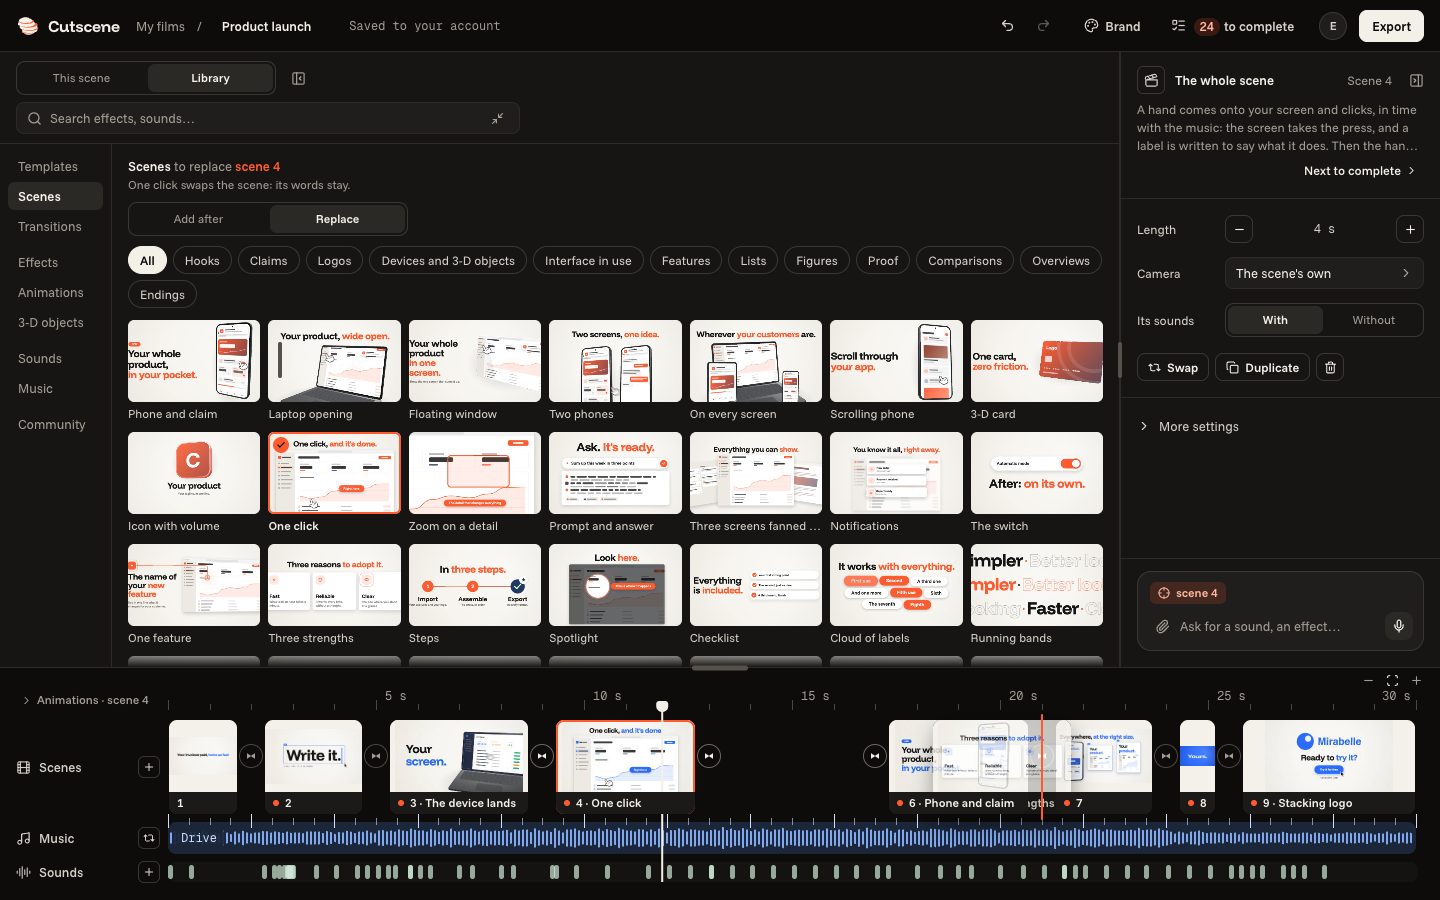
Move it
Slide a scene along the strip at the bottom, to the left or the right: an orange line shows where it will go.
- 04
Duplicate or delete
In “The whole scene”, “Duplicate” makes a copy right after it, the bin takes it out. A right click on a scene, at the bottom, opens the same gestures. ⌘ Z undoes.